Sunday, December 30, 2012
Thursday, December 20, 2012
Monday, October 22, 2012
homemade apple fritters...
Homemade Apple Fritters Recipe: Printable Recipe
1 heaping cup AP flour
1/3 cup sugar
1 tsp. baking powder
dash salt
1 – 2 tsp. cinnamon (depending on how much you love cinnamon)
1/4 tsp. nutmeg
1/2 tsp. vanilla
1 T. butter, melted
1 egg
1/3 cup milk + plus more if needed
1 – 1 1/2 cups chopped apple, your favorite kind for eating, peanut sized or smaller
oil for frying
milk and powdered sugar glaze for dipping or just powdered sugar for dusting
(About 1 cup pwd. sugar + 1 T. milk or more)
Mix all dry ingredients together, slowly add the wet ingredients minus the apple. Carefully mix until well combined but not overly beat,gently fold in apple pieces. The batter should be the consistency of a light cake mix. Once the oil is ready (when a test drop of dough floats to the top of the oil, a drop of water sizzles, or a piece of white bread browns in 60 seconds) then using a cookie scooper or soup spoon, place a 4-5 balls of dough into the oil. Be careful not to overcrowd and watch carefully for the underside to turn golden brown, then gently flip over and continue frying until done. I cooked mine about 35 seconds to 1 minute per side, but they were larger and I flattened them out a bit like what you get in the bakery – adjust cooking times based on size of fritters and temperature of your oil, ideally around 365° F. It is always a good idea to test one to ensure it comes out like you are expecting.
Monday, October 8, 2012
Thursday, October 4, 2012
Sunday, September 23, 2012
Homemade soft pretzels...and homegrown tomatoes..
Made a batch for my snack during college football game watching yesterday..... (for recipe check sidebar under soft pretzel for link)
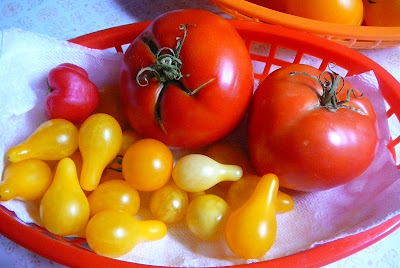
My tomatoes are coming on finally...I planted late. Apparently I have many more yellow than red ones..but they are all so good!
My tomatoes are coming on finally...I planted late. Apparently I have many more yellow than red ones..but they are all so good!
Monday, August 20, 2012
Tuesday, July 24, 2012
still in a drought in Ohio...
my bushes are green and I am thankful for that. My grass has been brown for weeks now. I have not had to have it mowed for over a month. It looks like a desert around here. We did finally get some rain and I have only a few specks of grass looking even remotely green. I am thankful for the rain we got though.
Prior to that rain the grass was all brown....just really brown..looked like dried straw. It was really bad. I don't think I have any pics of it like that. Now I have a few sprigs of green sprouting up here and there.
I guess it is starting to make a comeback now with the moisture...but since I get full sun and have no shade trees...my yard may take a long time to recover. It saves me paying the mowers...and I really don't mind having brown grass..I am just thankful my bushes and the neighbor's trees so far have not died off or suffered too much.
Sunday, July 15, 2012
Monday, July 9, 2012
Raccoon visit .....
been having a couple raccoons visit occasionally to eat the birdseed I have been putting out...and often they hang around in the morning probably a little too long...here is a short clip of 2 of them from the other morning.
Sunday, July 1, 2012
Monday, June 25, 2012
homade tomato pie.....yum
Tomato Pie
1 pre-baked pie shell
Spread 2 Tablespoons or so of any kind of mustard you like on baked pie shell crust.
Place 1 layer of sliced tomatoes in bottom of crust. (I also added some sliced Vidalia onions on top of the tomatoes but you don't have to).
Sprinkle the 1st layer of tomatoes with a layer of cheese..any kind you like. I used a mixture of shredded cheeses like you buy in the store already pre-packaged.
Place another layer of tomatoes on top of that...sprinkle with (onions if you want again) and then another layer of cheese. Work your way to the top of the pie crust.
You end with cheese layer.
For the topping you can mix 1/2 cup of mayo and 1/2 cup of Parmesan cheese..spread over cheese and tomato layers. (You do not have to use this last step ..it is super rich...but it makes it good...but you can just have your last layer cheese or maybe top with bacon bits or something). If you need more you can always increase the mayo another 1/4 cup and same for Parmesan cheese...
Bake in 350 to 375 degree oven for about 15 to 20 minutes..till golden brown and bubbly on top.
Cool slightly so juice will set up some...slice and enjoy!
This is one of the best tomato pie recipes I have ever had or made!
Monday, June 11, 2012
Monday, May 21, 2012
Friday, May 11, 2012
antique Hoosier cabinets
my sister took this out of storage and gave to me to use in my kitchen..wasn't that nice of her? AND it looks wonderful in my kitchen too!
Monday, May 7, 2012
Sunday, April 29, 2012
Monday, March 26, 2012
Thursday, February 16, 2012
Monday, January 30, 2012
woodpeckers....
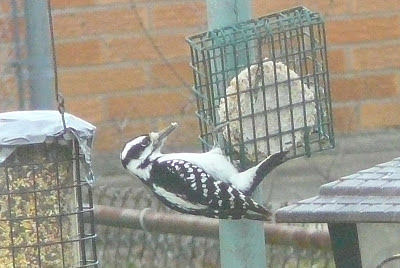


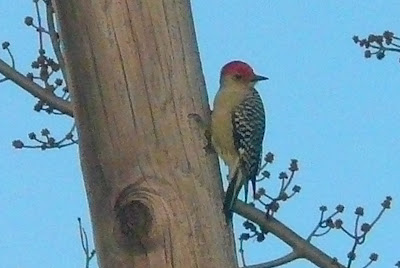

these photos were taken through my kitchen window so are not great quality..but I enjoy feeding and watching birds and animals come up to eat in my backyard. I have lived in this location now for 6 years..and have tried all that time to get woodpeckers to come up. I finally have them coming up to eat! I had a red-bellied woodpecker and a hairy woodpecker so far...I am so thrilled and excited! Here are a few shots
Wednesday, January 18, 2012
Subscribe to:
Comments (Atom)


